How to Migrate from Azure Lab Services: Step-by-Step
Migrate from Azure Lab Services before June 28, 2027: choose to rebuild or migrate, move VM images first, then labs in batches, and verify before cutover.

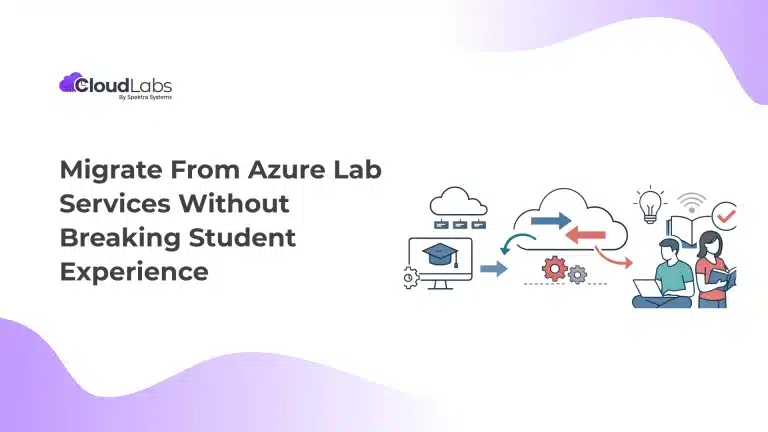
Azure Lab Services retires on June 28, 2027, and Microsoft closed new sign-ups on July 15, 2024. To migrate, make two decisions for each lab: rebuild it or migrate it, and rebuild or migrate its custom VM image. Images always move first, because the CloudLabs lab migration tool matches each lab to its migrated image by name. For one or two simple labs, starting fresh is usually faster; for larger environments or hard-to-rebuild images, migrate the images first, then the labs in batches. Test every migrated lab before anyone teaches on it, cut over between terms rather than mid-course, and run a pilot at least one term before your first production course.
What replaces Azure Lab Services, and what “migration” means here
Microsoft, in its retirement guide, lists its own services, Azure Virtual Desktop and Windows 365 Cloud PC, besides Azure partner solutions as transition options. CloudLabs by Spektra Systems is one of the partner solutions listed as well. For how the options compare, see Azure Lab Services alternatives compared.
There is no in-place upgrade. Microsoft isn’t moving your labs to a new version of the service. Migration means taking your labs and their custom images off Azure Lab Services and rebuilding them, or moving them with tools, on another platform.
The deadline sets what you keep. After June 28, 2027, you lose access to your lab accounts, lab plans, and labs. You do keep access to your Azure Compute Gallery and images saved there. Those images can remain available for later reuse or migration, but Azure Lab Services labs themselves will no longer be accessible after retirement. For the full retirement timeline, see the Azure Lab Services retirement timeline.
Azure Labs migration paths: which labs and images to rebuild, and which to migrate
Every Azure Labs migration comes down to two choices per lab.
- First, what to do with the lab: the course environment with its settings, schedule, and users.
- Second, what to do with its custom image: the VM disk your team built with the course software installed.
For each, you either start fresh on the new platform or migrate what you have.
| Start fresh with the image | Migrate the image | |
|---|---|---|
| Start fresh with the lab | Path 1: rebuild both. Best for one or two simple labs, or when you want a newer base image. | Path 2: migrate the image, then create a new lab on it. Best when the image is hard to rebuild but the lab settings are simple. |
| Migrate the lab | Not possible for labs that use a custom image. The lab migration tool needs the migrated image to exist first. | Path 3: migrate the image, then the lab. Best for many labs, complex images, or labs whose users should move with them. |
When using the CloudLabs lab migration tool, labs that use custom images require those images to be migrated first because the tool maps the lab to the corresponding migrated image.
Questions that decide your path
- Custom images. Can you rebuild the image quickly, or would it take days of installs and testing? Rebuild simple images; migrate complex ones.
- Custom virtual networks. Do your labs connect to your own network, such as a license server or campus resources? If so, a new virtual network and peering must exist on the new platform before you create or migrate any lab.
- Number of labs. With one or two labs, creating them from scratch is usually faster. With many, the migration tool helps you move them in batches.
- Users. Are you comfortable adding or importing users after the move? If you’d rather bring the user list along, migrate the lab.
Is there a migration tool? Microsoft doesn’t provide one. Its guide says partners might provide tooling to migrate labs automatically, and CloudLabs does: an image migration script and a lab migration tool, covered in the next two sections.
When starting fresh is the better choice. Microsoft notes that it’s often more efficient to create new labs than to move old ones. That’s true when you have only a few labs, when your images are due for an upgrade (for example to Generation 2 VMs), or when you plan to redesign the lab anyway.
How to migrate custom VM images
If your required image exists only within Azure Lab Services, export it to an Azure Compute Gallery first; the CloudLabs image migration script works with images stored in an Azure Compute Gallery. You need it for Path 2 (migrate the image, then create a new lab) and Path 3 (migrate the image, then the lab): any time an image is too complex to rebuild, or a lab that uses the image is going to be migrated.
Before you start
You need two sets of access.
- On your Azure side: The Contributor role (or higher) on the resource group or subscription that holds the compute gallery. A custom role also works if it has reader access plus permission to create managed disks.
- On the CloudLabs side: An admin account on the CloudLabs portal, plus five values the CloudLabs team supplies: resource group, tenant ID, subscription ID, application ID, and application secret. In practice, image migration starts with contacting CloudLabs.
From the Azure portal, note the image definition names, the compute gallery name, its resource group, and the subscription ID.
Running the script
-
Install the Azure PowerShell module:
Install-Module Az -
Open PowerShell ISE as an administrator.
-
Download the script,
MigrateVMImagestoCloudLabs.ps1:Invoke-WebRequest -Uri https://cloudlabs.ai/alb-imagemigration-script -OutFile C:\MigrateVMImagestoCloudLabs.ps1 -
Sign in to your source Azure environment with
Connect-AzAccount, using the account that has the roles above. -
Run the script with your source resource group, gallery name, subscription ID, a comma-separated list of image names (
-VMImagesList), and the five CloudLabs values. -
Keep the PowerShell window open. The script checks copy progress every 2 minutes and tells you when it’s done. Closing the window or pressing Ctrl + C stops the migration.
-
To migrate more images, run
Connect-AzAccountagain, then rerun the script.
The copy runs server-side in Azure; nothing downloads to or uploads from your computer. The time depends on the size and number of disks, so plan for it rather than expecting a fixed time.
What you get
- A new gallery in CloudLabs, named after your source gallery with a “migrated” suffix, holding the copied images. Your original images stay where they are.
- The temporary disks the script creates in your resource group are deleted automatically when it finishes.
- To use the images, go to Manage VM Lab > Settings > Custom Images, add the migrated gallery, open Manage Images, and select Sync Image.
If an image fails, the script writes a log file (CloudLabsVMImageMigration_ScriptLog) in the folder you ran it from; send it to the CloudLabs team. Confidential VM images aren’t supported.
Check your images before you rely on them
Don’t assume every image works unchanged on the new platform. Microsoft notes that Azure Lab Services exports only specialized images, and suggests recreating an image if you’re moving to Generation 2 VMs or need a generalized image. Test each migrated image in a pilot lab before a course depends on it.
Microsoft’s retirement scripts repository on GitHub is for deleting unused Azure Lab Services resources, not for migrating them.
How to migrate labs in batches
Once your images are in CloudLabs, the lab migration tool recreates your labs from Azure Lab Services lab accounts or lab plans, in batches, on top of the migrated images. The order never changes: images first, then labs, then verification.
The order of operations
- Set up networking, if your labs need it. Labs that connect to your own network need a new virtual network in CloudLabs, peered with yours, before any lab moves. You pass that network’s name to the lab migration tool when you run it.
- Migrate the images the labs depend on, as described above.
- Run the lab migration tool against your lab accounts or lab plans. It looks up each lab’s image by name in the migrated gallery and recreates the lab on it.
- Verify each lab before anyone teaches on it (see the checklist in the next section).
Users are optional. You can migrate each lab’s user list along with it, or leave users behind and add or import them afterwards. Starting clean is often simpler if your student lists change every term anyway.
What changes names, not function
A few Azure Lab Services concepts carry over under new names. Knowing them before your first login saves a lot of search time.
| In Azure Lab Services | In CloudLabs VM Labs |
|---|---|
| Lab plans and lab accounts | Tenant-level Global Lab Settings: one place for settings that used to be spread across entities |
| VM pool | Lab Instances: labs deploy on demand when learners request them, managed from the Lab Instances page |
| Per-user lab hours | Restrict VM Uptime: an optional per-user quota that includes scheduled events |
| Password reset links | Unique, randomly generated passwords for each user, distributed directly |
Recurring start and stop schedules are available in VM Labs, and labs connect to your existing LMS through LTI 1.1 and LTI 1.3.
What carries over, and what to check
The migration tool carries over each lab’s title, expiry date, idle-shutdown settings, image, region, and VM size. Student assignments, schedules and usage quotas aren’t confirmed to carry over, so check each migrated lab and set them up again where needed.
What Does the CloudLabs Migration Tool Actually Migrate?
Here is a list of things that the Migration Tool carries over:
| Azure Lab Services item | Migration behavior |
|---|---|
| Lab | New lab is created in CloudLabs |
| Custom image | Migrate separately first |
| Lab title | Migrated |
| Expiry date | Migrated |
| Idle shutdown | Migrated |
| VM size/SKU | Migrated/mapped |
| Region | Migrated |
| User list | Optional |
For a full breakdown of renamed concepts, see CloudLabs for Azure Lab Services users.
Before you cut over: capacity, verification and the pilot
A migration isn’t finished when the labs move. It’s finished when you’ve checked them, piloted them, and made sure there’s enough Azure capacity to run them. Do all three before you retire Azure Lab Services.
Request capacity early
Your Azure subscription’s core limits can’t be transferred from Azure Lab Services to a new platform. Cores for the new setup have to be requested again. Microsoft advises requesting them as early as possible, in smaller increments rather than one large request, and staying flexible on region.
You may need fewer cores than before. Microsoft suggests basing the request on actual lab usage, and platforms that share multi-session VMs or deploy labs on demand can run the same courses on less capacity.
Verify every migrated lab
- All VM images migrated and visible in the CloudLabs image gallery
- Every lab recreated from its migrated image, images-first order confirmed
- Lab titles present, with expiry date and idle-shutdown settings correct
- Correct Azure region and VM size on every lab template
- User lists complete (if you migrated users) and access working
Then invite one or two test users into each lab before opening it to a full class.
Sign off the pilot
A pilot is a real course run on the new platform with a small group. It passes when:
- Instructors have tested VM Shadow on a live session
- Students have tested browser-based access end to end
- LMS/LTI integration works for each course
Only then schedule the production cutover, between terms, with faculty and IT trained and a support escalation path confirmed for go-live week.
Working back from Fall 2027
Most institutions leaving Azure Lab Services have one to three people running the whole migration, alongside everything else. The way to make that manageable is to work backwards from the date that can’t move, June 28, 2027, and from the term you want to open on the new platform.
| When | What to do |
|---|---|
| Now to December 2026 | Inventory labs and images, choose your path for each lab, and put in the budget request. Check your institution’s budget cycle now; approvals for a new platform can take months. |
| Spring 2027 term | Pilot one or two real courses on the new platform. Migrate images and request cores in parallel. |
| Between spring and summer terms | Cut over production labs in waves, after verification and instructor training. |
| June 28, 2027 | Azure Lab Services retires. Any lab still on it becomes inaccessible. |
| Fall 2027 | Sections open on the new platform, with the pilot lessons already built in. |
How long the technical work takes depends on how many labs and images you have and how complex they are. There’s no fixed figure, which is exactly why the pilot needs a full term.
Migrate in waves, not all at once
Avoid: Cutting over mid-course, running a major migration right before term starts, leaving your most complex images for the final wave, training instructors after the move, and discovering integration issues in production.
Aim for: Early assessment, a pilot before production, migration between terms, controlled waves, and verification before learners get access.
Risks of rushed migration vs. planning now
When migration is rushed, instructor readiness, LMS checks, and cost planning all get squeezed into a much smaller window.
| Risk | In a rushed migration | Impact on students and instructors | How planning helps |
|---|---|---|---|
| Operational disruption | The migration overlaps with active terms. | Delayed lab access, slow sessions, or interrupted workshops. | Recreate labs early, test them, and move courses gradually around the academic calendar. |
| Unprepared instructors | Instructors meet new tools with no preparation time. | Sessions run less smoothly, and teaching quality suffers. | Instructors review the platform through pilot sessions before rollout. |
| LMS integration issues | Lab launch links may behave differently. | Broken links, login problems, or delayed access. | Review LMS integrations before the final migration. |
| Unexpected cloud costs | Usage settings and resource limits are misconfigured. | Higher Azure usage and hard-to-predict costs. | Review usage patterns and adjust lab settings before migration. |
What teams can do during parallel migration?
CloudLabs VM Labs supports a parallel migration: Azure Lab Services and VM Labs run side by side while you move courses one at a time. During that window, your team can:
- Recreate existing lab environments in VM Labs
- Test migrated labs with instructors before students see them
- Run pilot sessions with a small group of real students
- Review LMS integration and lab launch links course by course
All the while, current courses keep running on Azure Lab Services.
Why parallel migration works
- Active courses aren’t disrupted. Students in this term’s courses keep using their existing labs until their course moves.
- Faculty get time to learn the platform. Instructors try VM Labs in pilot sessions before they teach on it.
- Students keep uninterrupted access. There’s no gap between the old lab going away and the new one being ready.
- You control the timing. Each course moves when it’s ready and verified, not all at once against the deadline.
Start with a Free Proof of Concept
CloudLabs offers a free, guided proof of concept for Azure Lab Services customers. Qualified customers can get up to $2,000 in Azure Credits offered by CloudLabs to support their transition from Azure Lab Services.
Experts review your current environment, labs, and images, build a migration plan and timeline, and support a pilot with your own courses: instructors test VM Shadow, students test browser access, and your team checks LMS integration end to end.
- Test the platform with selected users. Host controlled lab sessions, run live pilot tests, and collect actionable feedback.
- Get end-to-end managed support. Lab setup, configuration management, automation scripting, and priority issue resolution included.
- Explore clear migration timelines. CloudLabs experts will analyze your present lab setup and share estimated transition timelines.
- Run thorough compatibility checks with existing LMS. Verify integration between CloudLabs VM Labs and your existing learning ecosystem.
Start a free Proof of Concept (POC) and evaluate the platform in your real environment.
Get the full migration plan
The Azure Lab Services Migration Playbook (2026 Edition) covers everything in this guide in more depth, including a readiness checklist, the full 9-phase migration plan, and the pre-cutover checklist in a format you can share with leadership.
Download the Azure Lab Services Migration Playbook (2026 Edition)
For more guides and tools, visit CloudLabs VM Labs and Azure Lab Services alternatives and migration guide.
FAQs
Is there an official Microsoft migration tool?
No. Microsoft publishes cleanup scripts, not a migration tool. Microsoft's retirement guide says partners might provide tooling to migrate labs automatically. CloudLabs provides an image migration script and a lab migration tool for moving to CloudLabs VM Labs from Azure Lab Services.
Can I keep my images after retirement?
Yes. Images saved in your Azure compute gallery stay accessible after June 28, 2027. Labs, lab plans, and lab accounts don't.
Do core limits transfer to a new platform?
No. Azure subscription core limits can't be transferred from Azure Lab Services, so request cores for the new platform early.
How long does image migration take?
It depends on the size and number of disks. There's no fixed time, so run a test migration of one image during your pilot to gauge it.
Do I have to migrate users with my labs?
No. Migrating users is optional. You can move a lab's user list with it, or add and import users afterwards.
 Education CloudLabs at the EDUCAUSE Annual Conference 2026 Team CloudLabs is attending the EDUCAUSE Annual Conference 2026: Explore CloudLabs VM Labs, AI Lab Builder, and hands-on skill assessments.
 Education Fall 2026 Checklist for Universities: Are Your Virtual Labs Ready for the Next Semester? As universities prepare for the Fall semester 2026, lab readiness becomes a priority.
 Education Virtual Computer Labs at Scale: Challenges Universities Face Today Students, at a global scale, are increasingly embracing digital learning as an integral part of their educational journey.