How to enable Nested Virtualization in Microsoft Azure
Ready to See CloudLabs in Action?
Turn your ideas into hands-on experiences. Tell us what you're looking for, and team CloudLabs will help you find the right solution.
Cloud Technologies and software programs are witnessing some evolutionary changes over the years. While we got accustomed to using some specific Operating Systems of our choice, like the Windows series, Linux, macOS, now we have the liberty of running different OS (Operating systems) simultaneously for different applications and making the maximum use of resources available.
This can be made possible with the concept of nested virtualization.
What is Nested Virtualization?
The efficiency of installing VMs inside a VM is nested virtualization. To make this more accurate we need a hypervisor layered over a hardware component. This hypervisor called the host hypervisor extracts resources from the computer hardware and creates virtual machines which we call outer guest. With nested virtualization, you can install a hypervisor inside the VM that you created, this will be called a guest hypervisor and then you can spin multiple VMs from it inside the existing VM.
Prerequisites to run Hyper-V Machines
The following are requirements for running Hyper-V hosts inside a guest virtual machine:
- Hyper-V host and guest must both be either Windows Server 2016 or Windows 10 Anniversary update or later
- VM configuration level must be 8.0 or higher
- Only Intel processors are currently supported – running VT-x and EPT technology
Azure specific requirements
- Create a Windows Server 2016 VM
- All v3 virtual machines support nested virtualization
Hypervisors and their use cases
There are two main types of hypervisors that you can implement in your sandbox environments:
Type 1 Hypervisors- Also known as “bare metal” hypervisors, are installed directly on the computer that will host the virtual environments. If you want to run numerous virtual servers on a single machine, this is the best option. Microsoft Hyper-V, Citrix XenServer, and VMware ESXi are the most common type 1 hypervisors.
Type-2 Hypervisors- Network virtualization in the cloud requires Type 2 “hosted” hypervisors. Hypervisors are a type of hosted software that runs on top of the hosted system. Multiple operating systems can run on a type 2 hypervisor. They’re the best option for businesses that wish to test a variety of operating systems. Microsoft VirtualPC, VMWare, and VMWork are the most common type 2 hypervisors.
Virtualization in Azure
When it comes to Azure not only can you create a Hyper-V container with Docker, but you can also create a VM inside a VM by using nested virtualization. This nested environment gives you a lot of versatility in terms of serving your demands in different areas like development, testing, client training, demos, and so on.
For example, suppose you have a testing team using Hyper-V hosts on-prem today. They can now easily move their workloads to Azure by using nested VMs as virtualized test machines. The nested VM hosts will be used to replace physical Hyper-V hosts, individual testing engineers will have full control over the Hyper-V functionality on their own assigned VM Host in Azure.
Advantages of adopting Nested Virtualization
Nested Virtualization provides greater flexibility and reduces overhead costs compared to traditional VMs.
Running a Hyper-V within a VM helps you to optimize virtual environments even further, resulting in the following advantages:
- Cost savings: Increase the number of tools you can use and the number of workloads you can run without having to buy new hardware.
- Gain flexibility: You gain flexibility by being able to run many hypervisors on the same server.
- Working with previous software versions: Run software that requires a previous version of Windows or an operating system other than Windows.
- Configurations for testing: Create and uninstall various operating systems to see which one works best for your client’s business.
- Container support: Combine the flexibility of containers with the security of virtual machines. Containers mean less overhead and more flexibility when it comes to developing and deploying apps.
Uses for nested virtualization in the real world:
- Use nested virtualization to create development or test instances. Rather than buy a dedicated physical server, provision a server with a hypervisor and build VMs as needed
- Use nested virtualization for training/teaching new members about Hyper-V
- Use nested virtualization as an alternative to a private cloud. Building a private cloud can be challenging and costly
Create a Hyper-V VM in Azure :
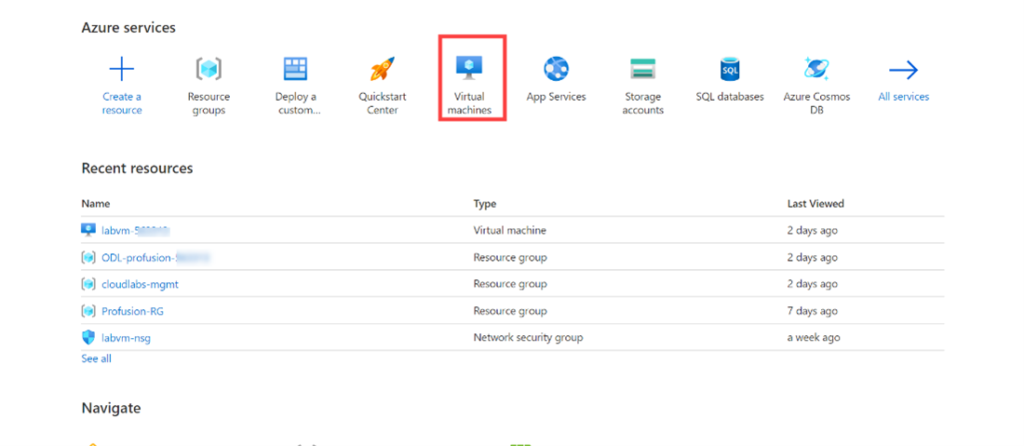
- On the https://portal.azure.com/ page, select Virtual machines in the web interface.
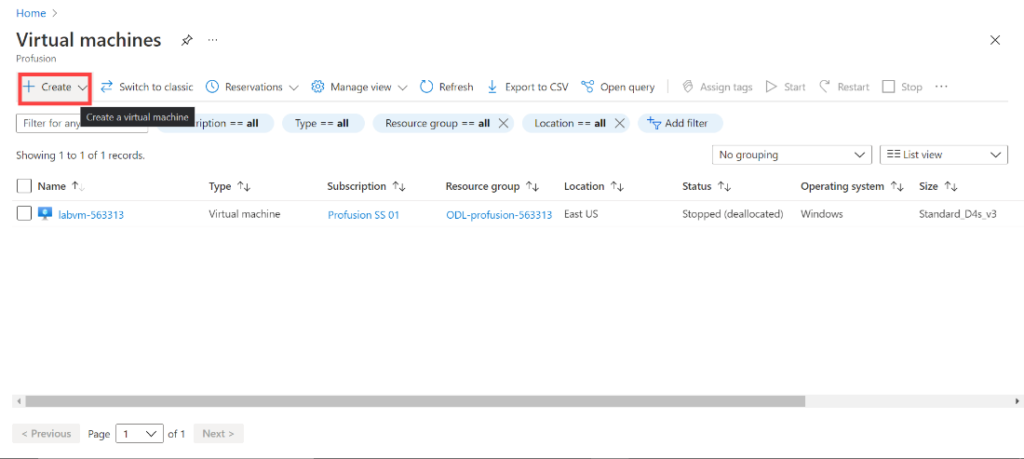
- On the Virtual machines page (Home > Virtual Machine), click Create to create a virtual machine.
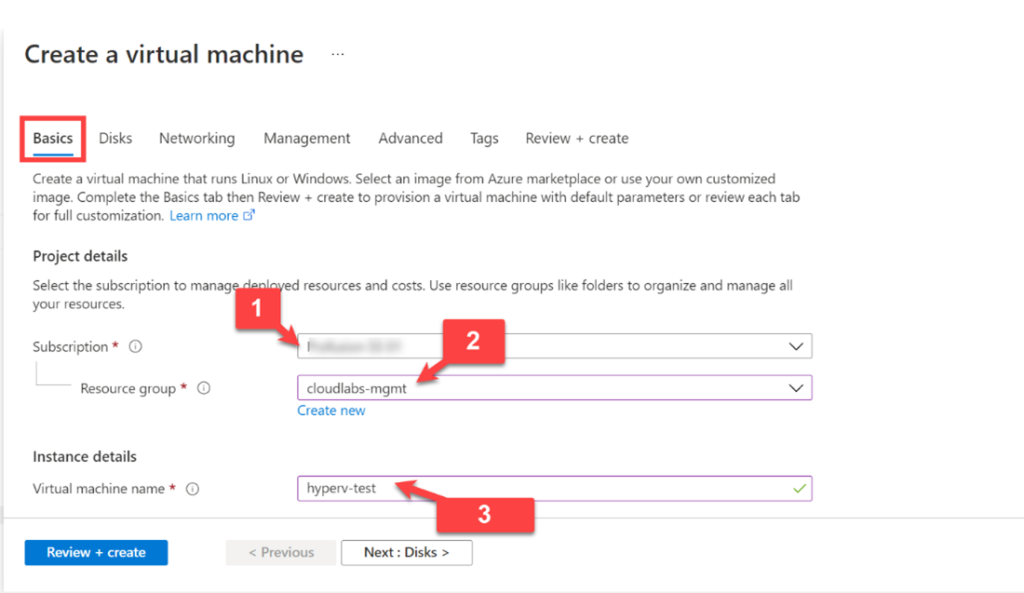
- The VM creation page contains multiple tabs, and each tab contains a couple of sections.
- Firstly, we need to add subscription details in the subscription tab by scrolling down and selecting where we want our Virtual Machine.
- Next, we need to select resource group or create new one.
- Further, we need to provide a name to our virtual machine
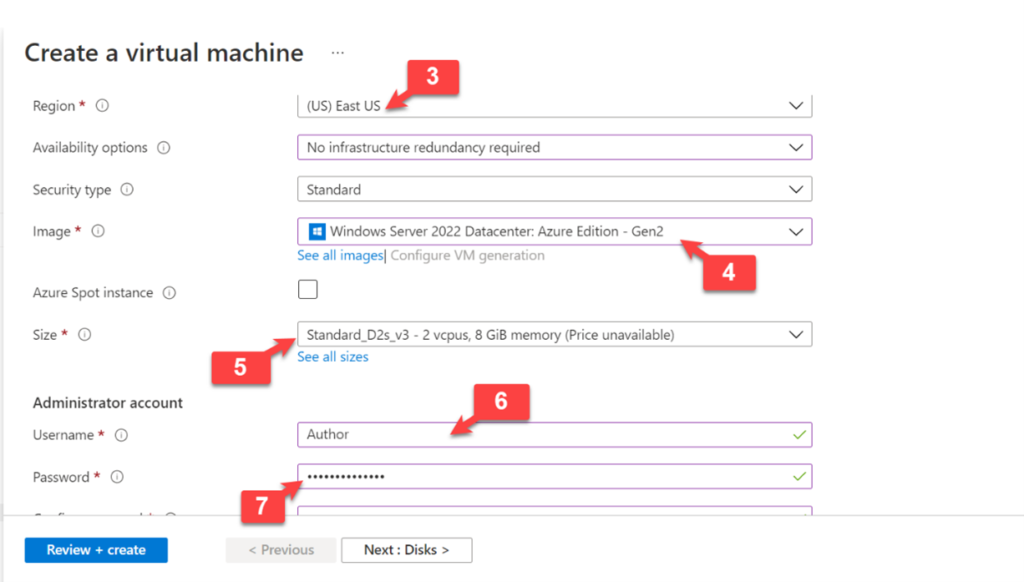
- Next, we need to add the region where we want our virtual machine to be.
- Select windows VM in image type, we can select any image of windows, either 206,2019 or 2022, hereby in the image we have selected 2022 image.
- Now, we need to select machine size, we have chosen machine size as D2s_V3.
Note :
*Azure VM Sizes that support Nested Virtualization * * *
*D_v3 * * *
*Ds_v3 *
-
E_v3 *
-
Es_v3 *
-
M *
-
F2s_v2 – F72s_v2*
- Next, we need to setup username and password for the authentication to the VM.
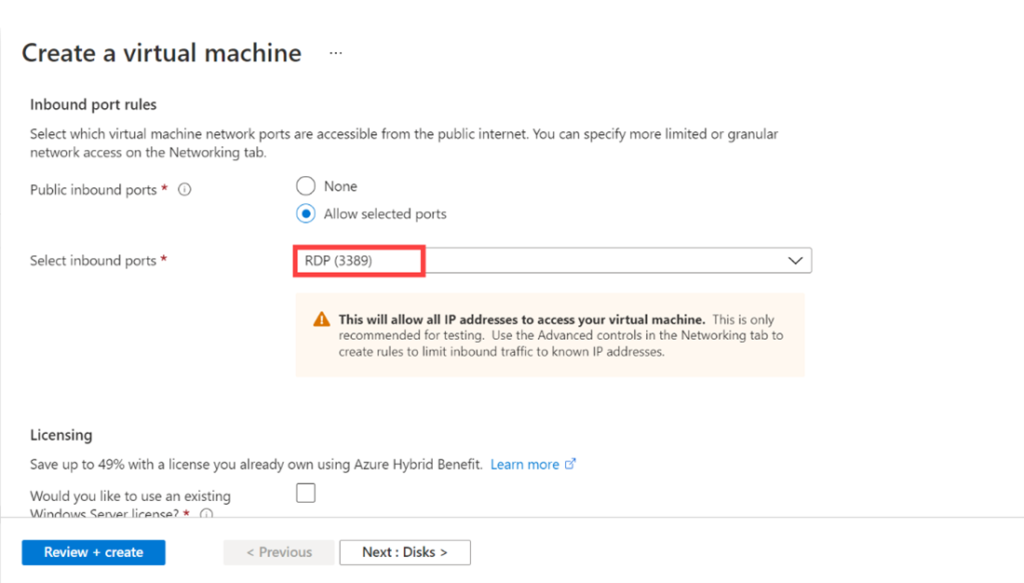
- Now, as it is windows VM, so we need to make sure that we have enabled port 3389 for RDP (Remote Desktop Protocol) to the VM in inbound rules as mentioned in the below image.
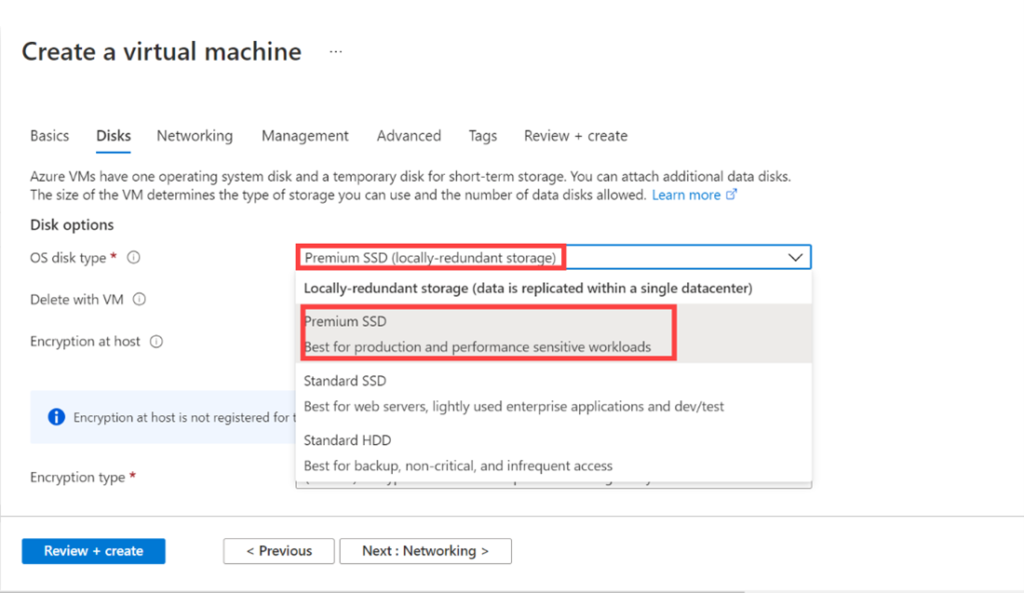
- As hereby, we need to run multiple guest VMs in Hyper-V, so it is recommended that we should use Premium SSD disk. Therefore, we are using Premium SSD, rest of the settings in disk tab can be default.
- Click Next.
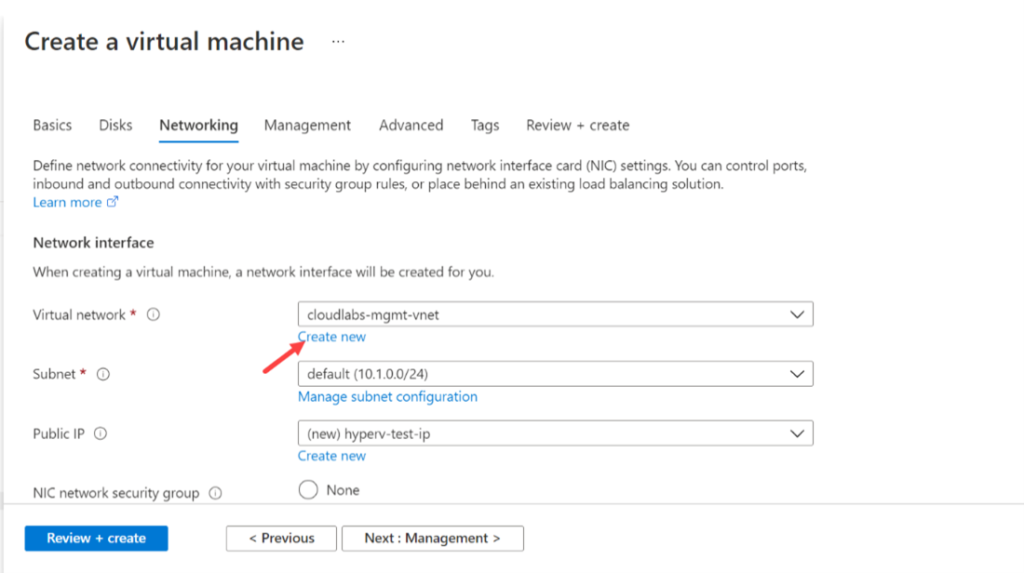
- Now, we need to add a network and a subnet where our VM will reside.
- We can create Virtual Network by clicking on Create new
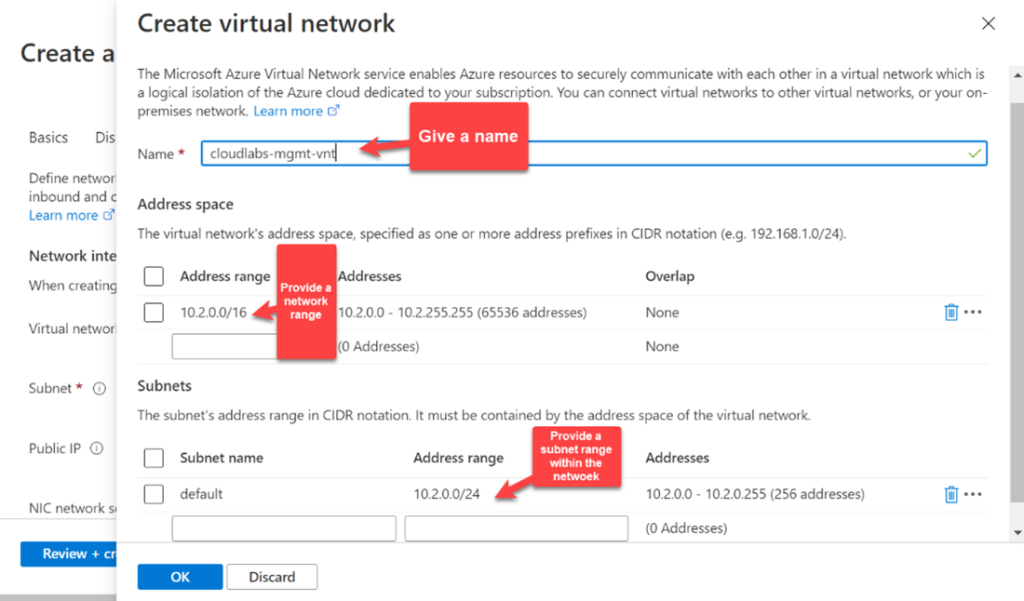
- Refer to below image for creating a virtual network for your virtual machine
- Leave rest of the settings as default.
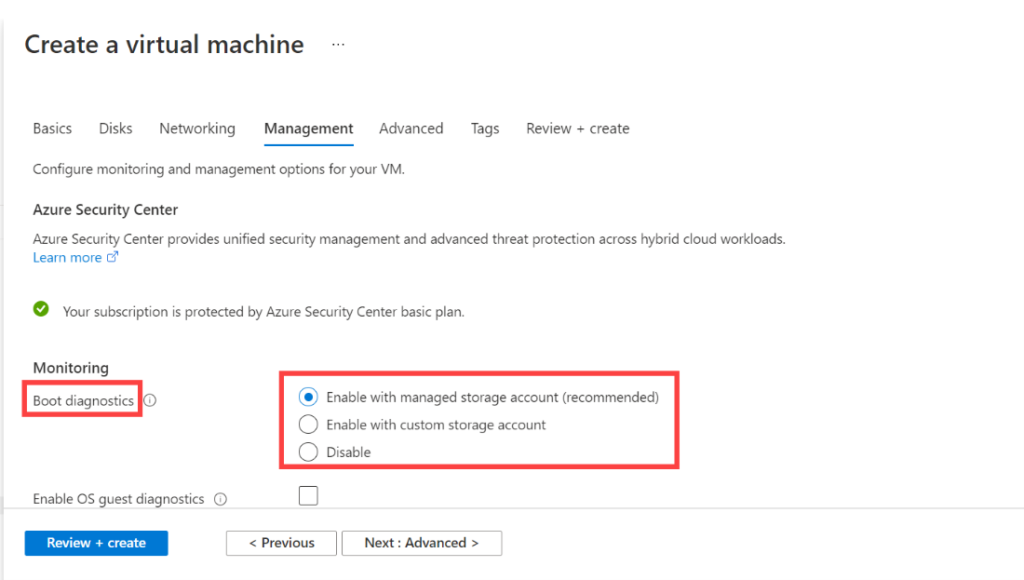
- Depending on the requirement, either we can disable the diagnostics, or we can go with the default setup of Enable with managed storage account, or we can use a storage account which is already created by us if any. See the below image for reference.
- Rest of the settings can be leave as default.
- Now, click on Review and Create.
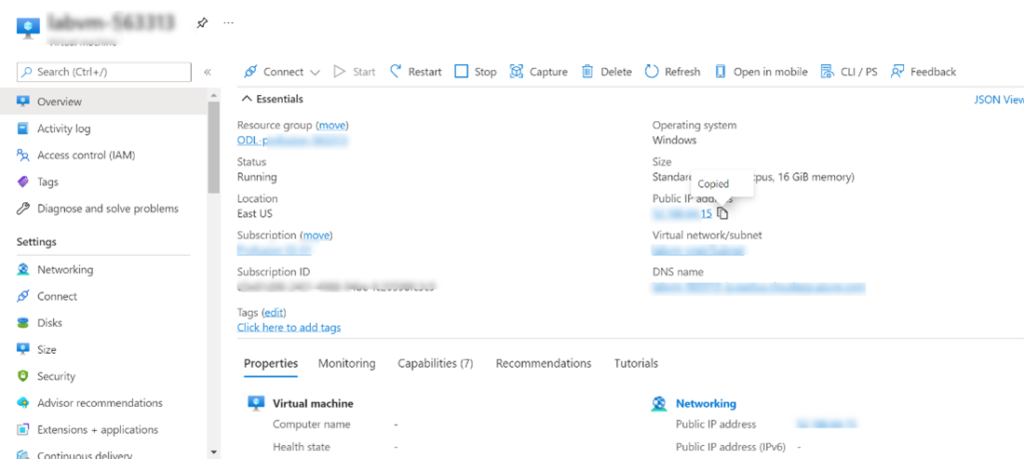
- Once the VM is ready, we can access the VM using RDP client as mentioned in the below steps.
Step 1: Copy the public IP address you got from the VM.
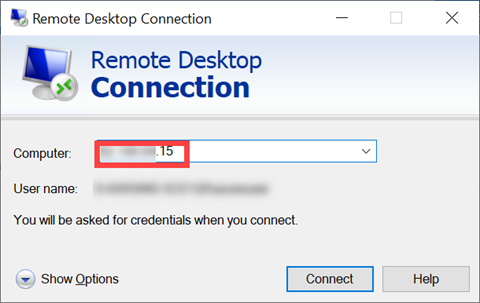
Step 2: Open RDP Client and paste the public IP which you got and click connect.
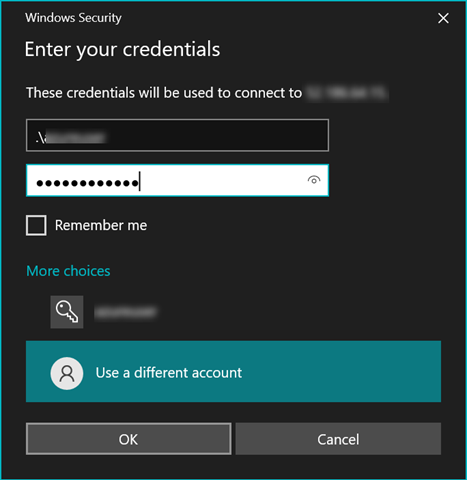
Step 3: Now add credentials which you added for the authentication and click on connect, you will be redirected to the VM.
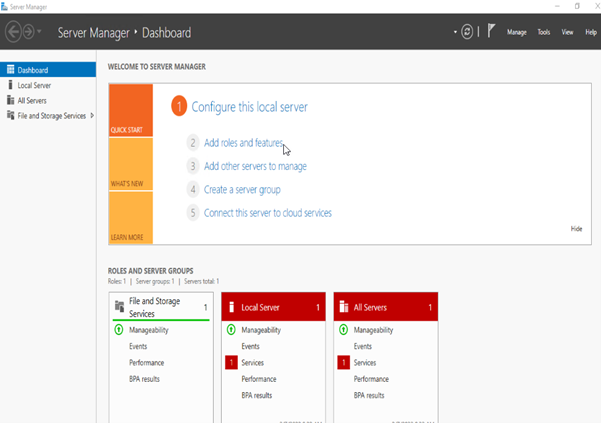
Install Hyper-V Role :
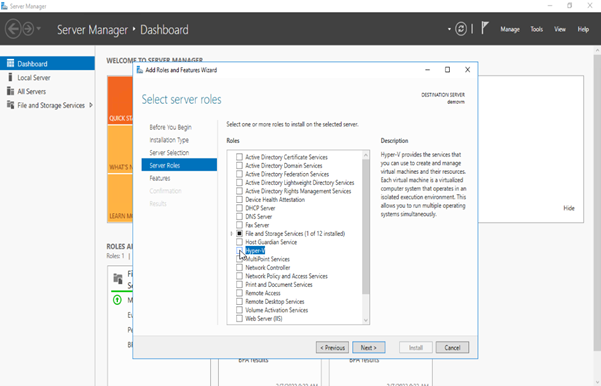
Once we login using the Public IP of the VM which we just created, we can install Hyper-V role using Server Manager and click on Add roles and features.
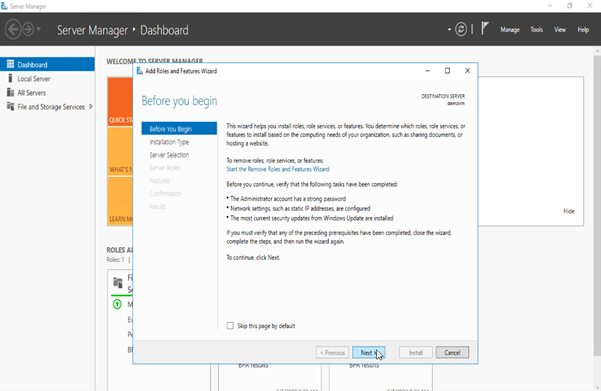
- Click on Next in the Before you begin page
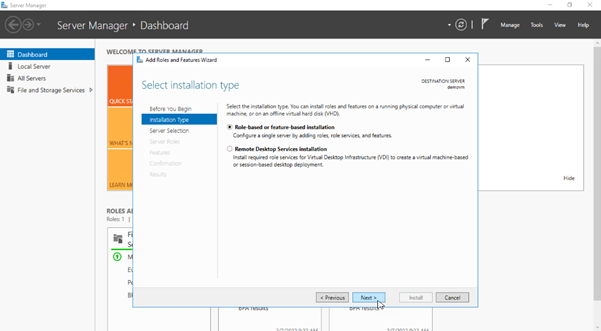
- Under Installation Type select Role-based or feature-based installation
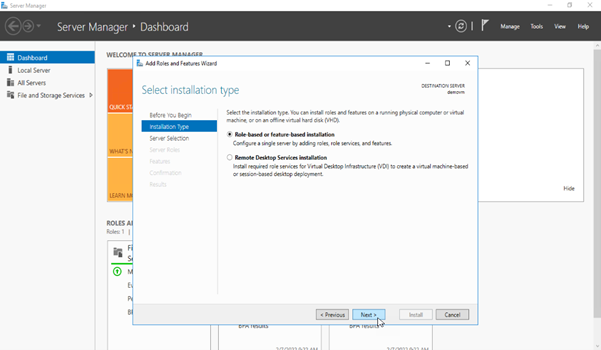
[Text Wrapping Break]
- Now select the Destination server from the Server Pool
- Now select the Hyper-V role which we want to install
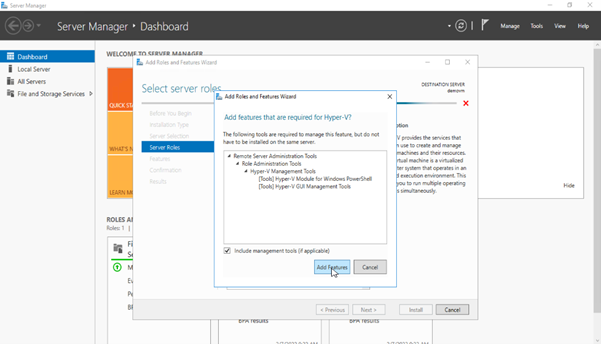
- Click on Add Feature so all the features required by the Hyper-V role are installed
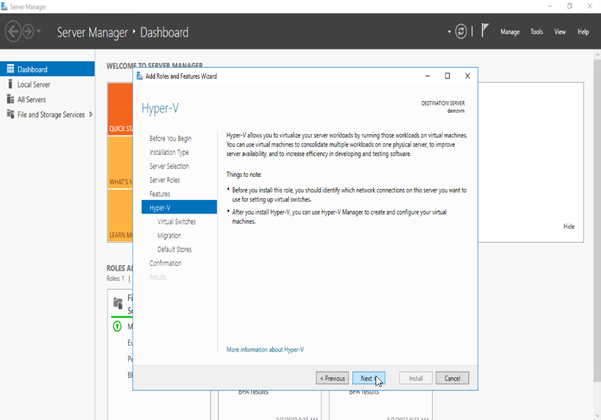
- Now, click on next to go ahead with the installation of the Hyper-V role
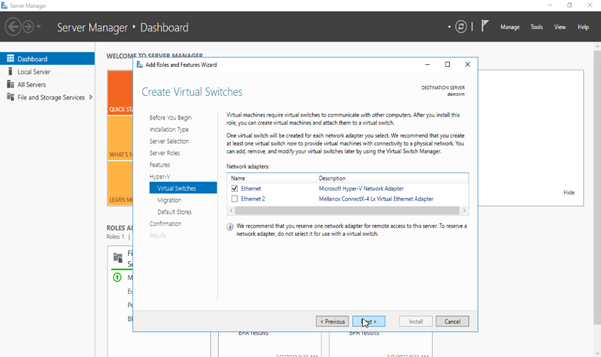
- Select the Microsoft Hyper-V Network adaptor (Ethernet) which can be used as the External Switch to the Hyper-V guest VM’s
- A Hyper-V virtual switch in external mode allows communications between virtual adapters connected to virtual machines and the management operating system. It uses single or teamed physical adapters to connect to a physical switch, thereby allowing communications with other systems.
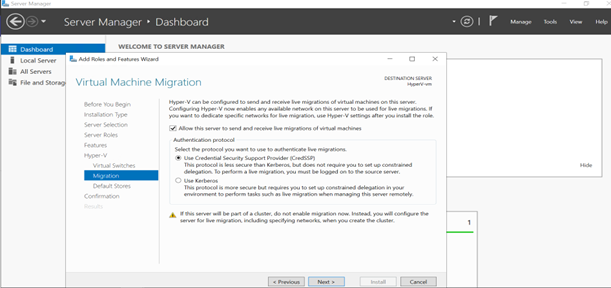
- Select the Protocols you want to use to authenticate live migrations.
In Windows Server, live migration is a Hyper-V functionality. It enables you to relocate operating Virtual Machines from one Hyper-V host to another without causing any noticeable downtime. The main advantage of live migration is that running Virtual Machines are not bound to a single host machine.
This enables activities such as emptying a virtual machine host before decommissioning or updating it. Live migration, when combined with Windows Failover Clustering, allows for the establishment of a highly available and fault-tolerant system.
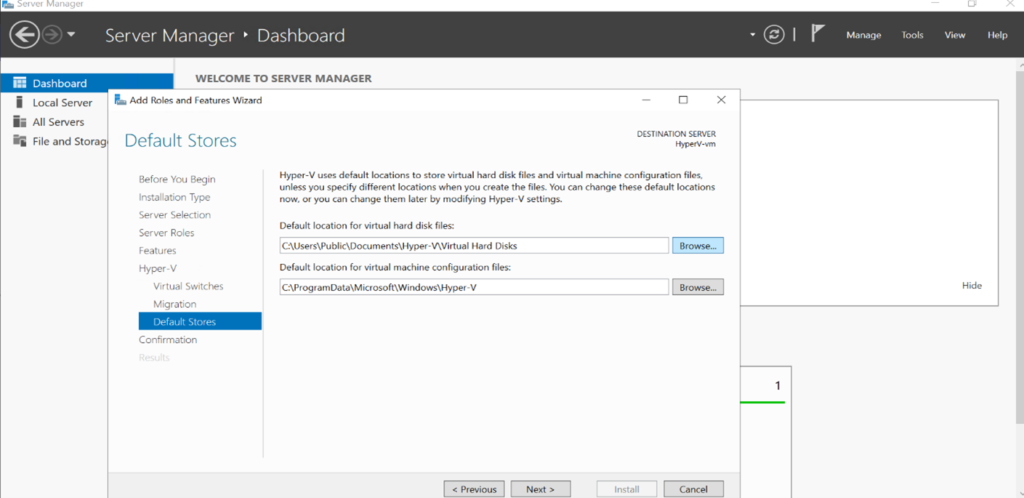
- Now, select the default location of the virtual hard disk files and virtual machine configuration files.
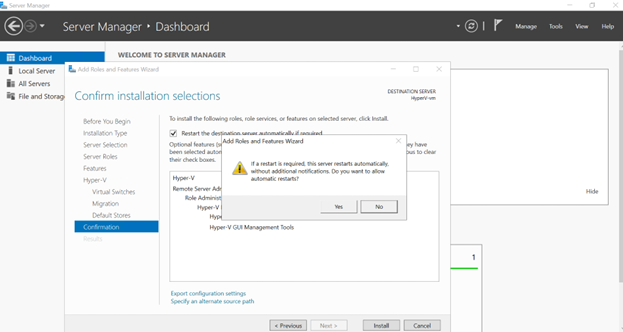
- Now click on install and restart the VM.
Setup Networking in Hyper-V :
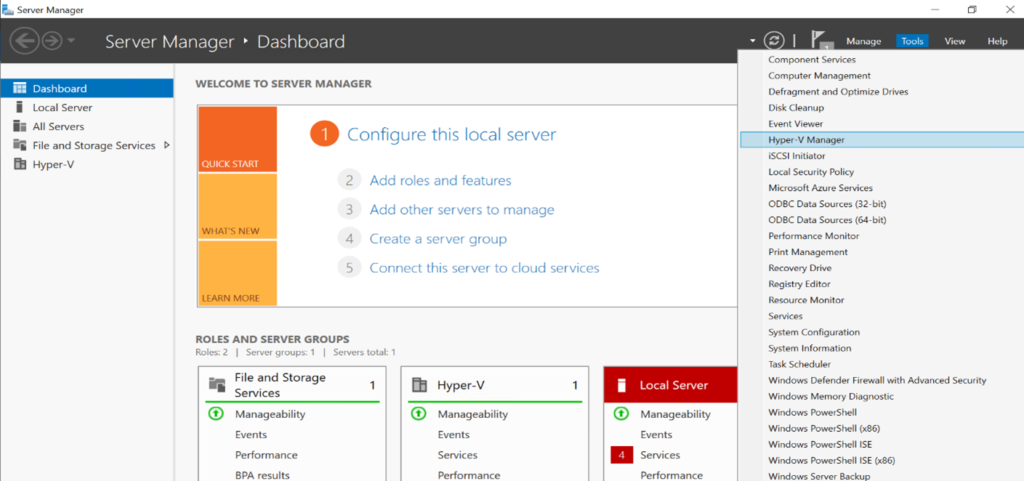
- Once installation is done, click on Tools in server manager and click on Hyper-V manager
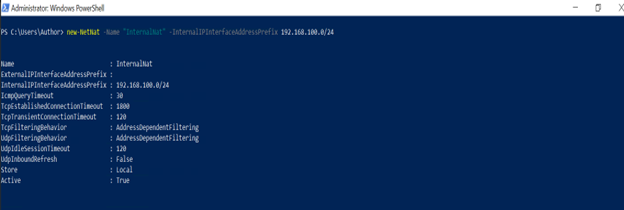
- Now let us create a Virtual NAT switch called Internal

- Once my switch has been created, we will run the cmdlet below to find the Virtual Switch ifIndex number which is number 17.
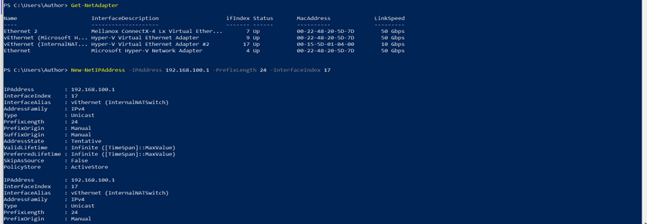
- Now let us create a Default Gateway IP address
- We will now create the NAT subnet with the address space 192.168.100.0 which means that all the VM that I will create will need to be in the range of the subnet.
- Now let us create a VM inside Hyper-V, click on New -> Virtual Machine

- In the New Virtual Machine Wizard window, on the Before You Begin page, click Next.
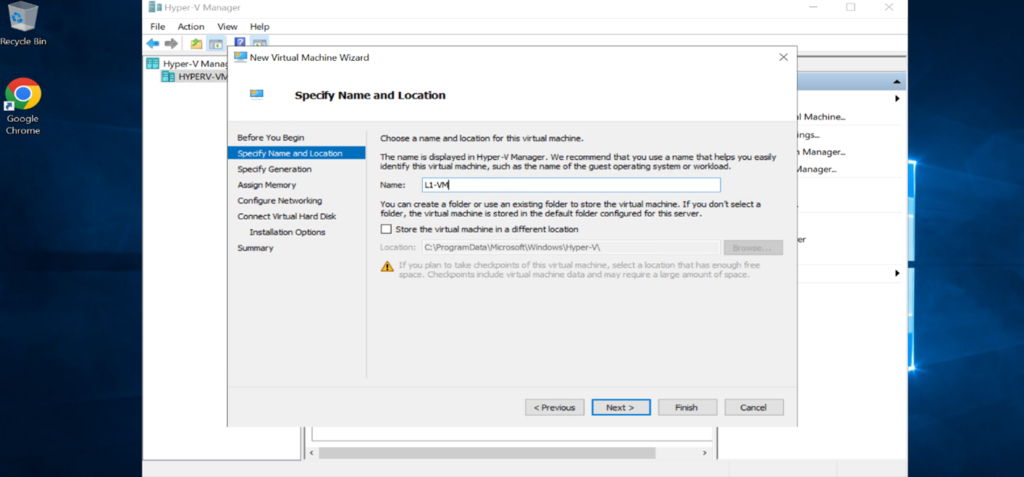
- On the Specify Name and Location page, type the new virtual machine’s name in the Name box. In this example, the VM name is L1-VM.
If you need to change the location for the new VM, put a check on the Store the virtual machine in a different location box, then browse or enter the path in the Location box. If the folder path you specify does not exist, the wizard will create it.
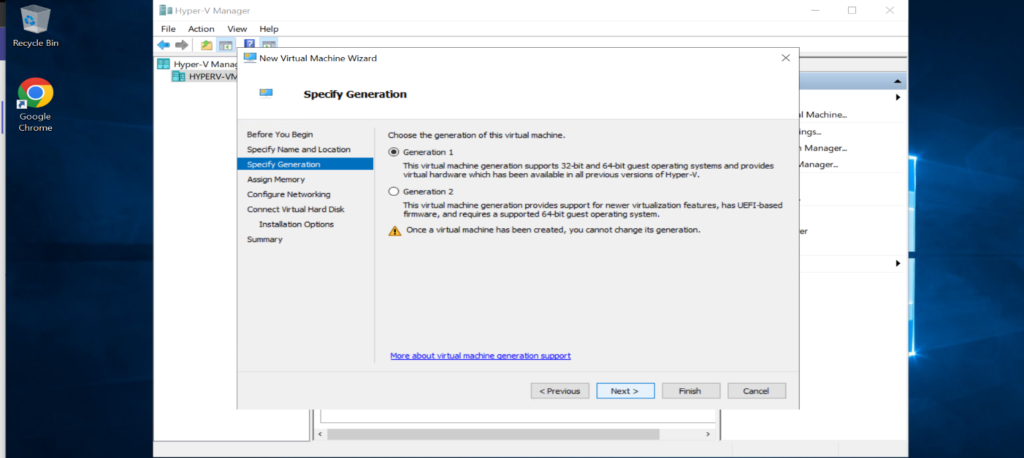
- Next, on the Specify Generation page, choose the VM generation version.
The options are:
- Generation 1 – Supports 32-bit and 64-bit guest operating systems from Windows 7 and Windows Server 2008 onwards. This example will use a Generation 1 VM.
- Generation 2 – Supports only 64-bit guest operating systems from Windows 8 and Window Server 2012 onwards. This generation also has UEFI-based firmware. After selecting a VM generation, click Next.
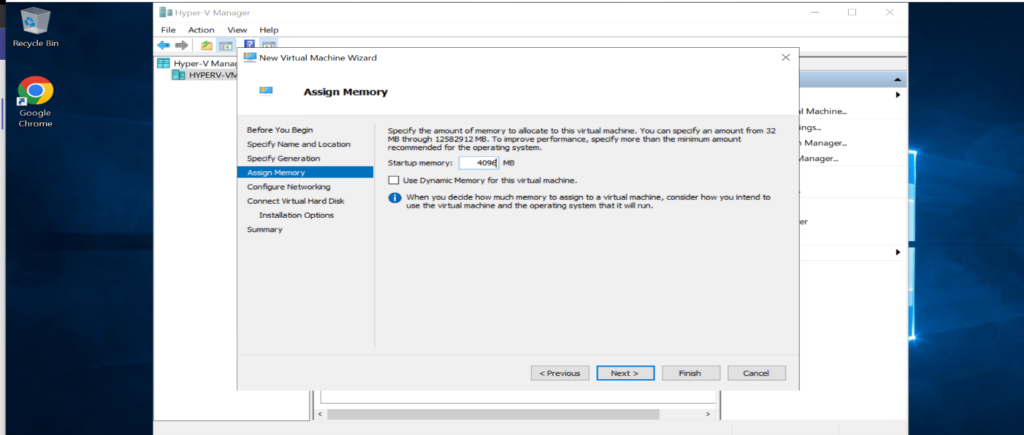
- On the Assign Memory page, specify how much memory to assign the VM. This example assigns 4GB (4096 MB) of memory to the VM.
Uncheck the Use Dynamic Memory for this virtual machine box. Hyper-V nested VMs does not support dynamic memory. After finalizing the memory settings, click Next
- On the Configure Networking page, select the network adapter you would like to attach to this VM. We have attached the one which we created in the previous steps.

- Next, on the Connect Virtual Hard Disk page, you have the option to:
- Create a virtual hard disk – This option creates a new virtual hard disk (VHD) and lets you customize the name, location, and size. The new VHD will be empty, and you will have to install an operating system afterward.
- Use an existing virtual hard disk – This option lets you choose an existing VHD (if you have one) that you want to be attached to the VM instead of creating a new one.
- Attach a virtual hard disk later – Choose this option if you want to skip this step and continue creating the VM without a VHD. You can still create a new or attach an existing VHD after you’ve created the VM.

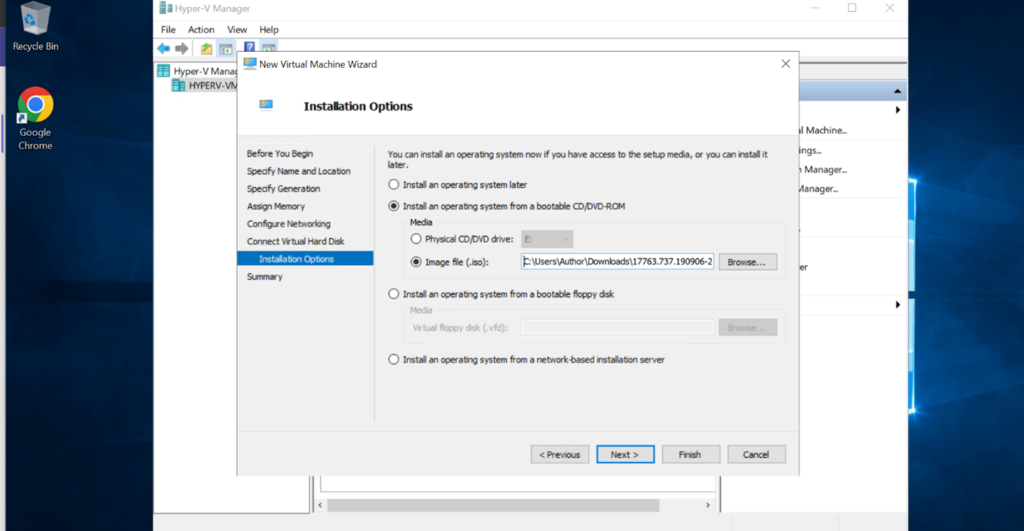
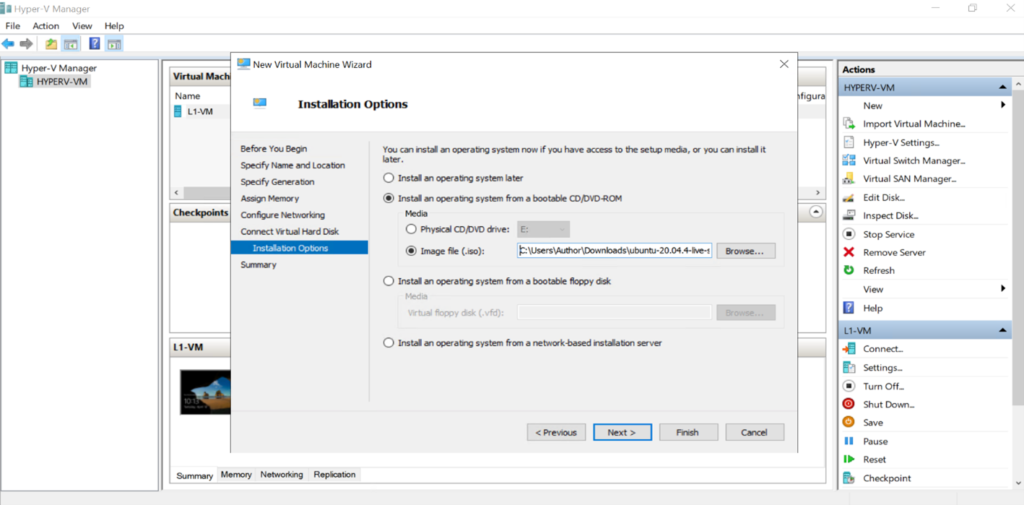
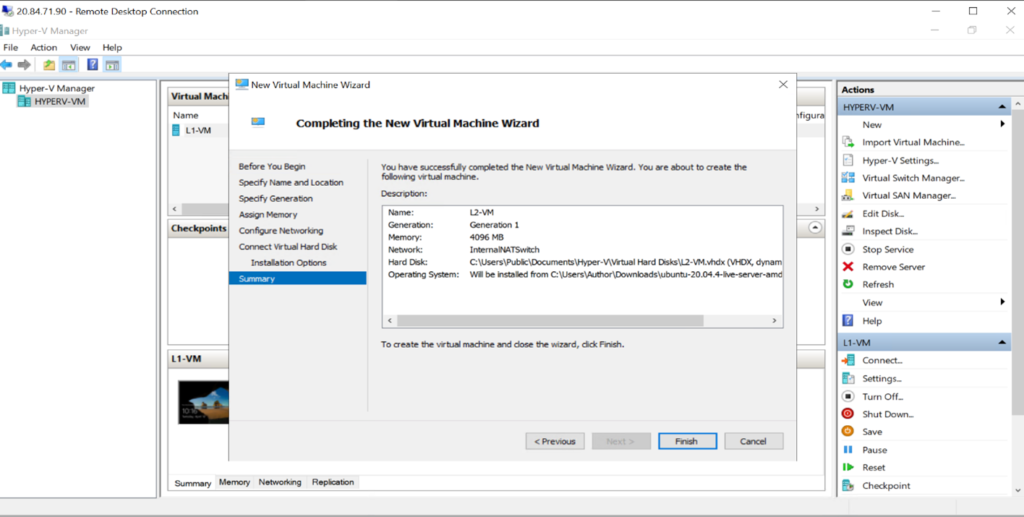
- On the Installation Options page, choose how you want to install the operating system (OS), we have installed it using ISO option (the iso has been downloaded by us from chrome of windows 2016(Windows) and Ubuntu (Linux) which we will use:
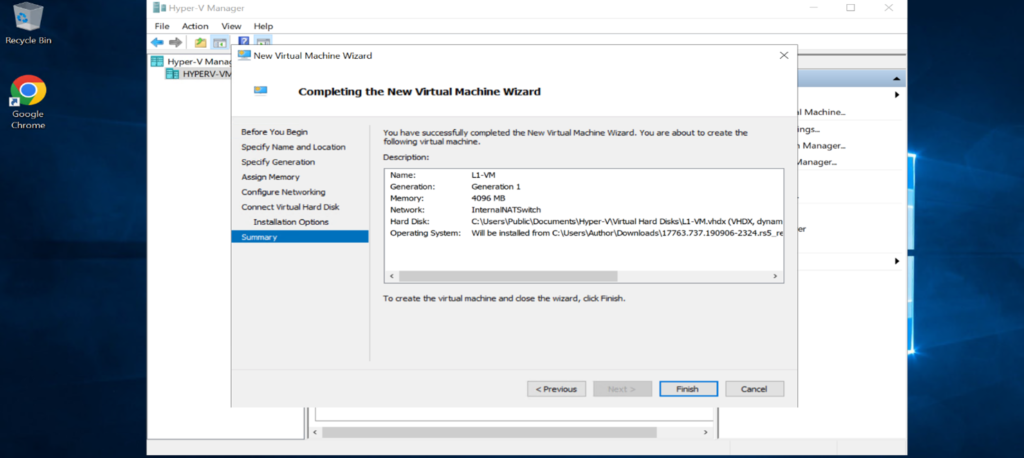
- Finally, on the Completing the New Virtual Machine Wizard page, review the new VM’s Description. When you’re sure that you didn’t miss a step, click Finish.
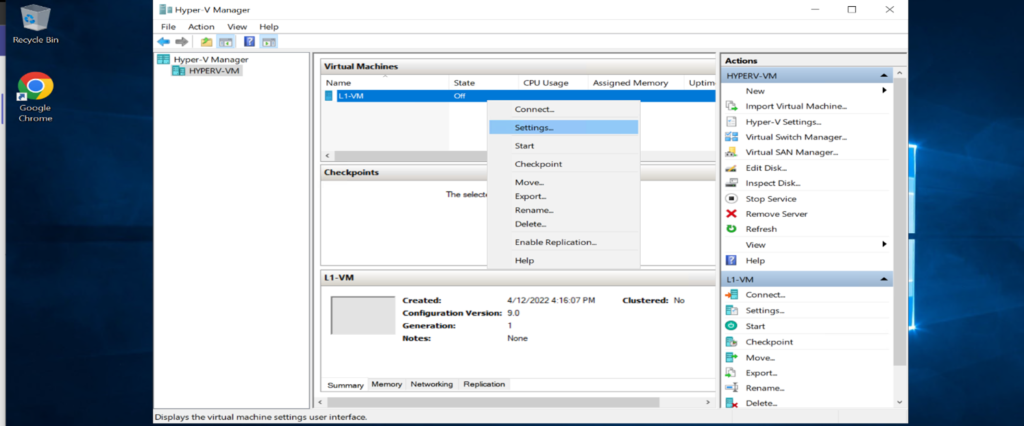
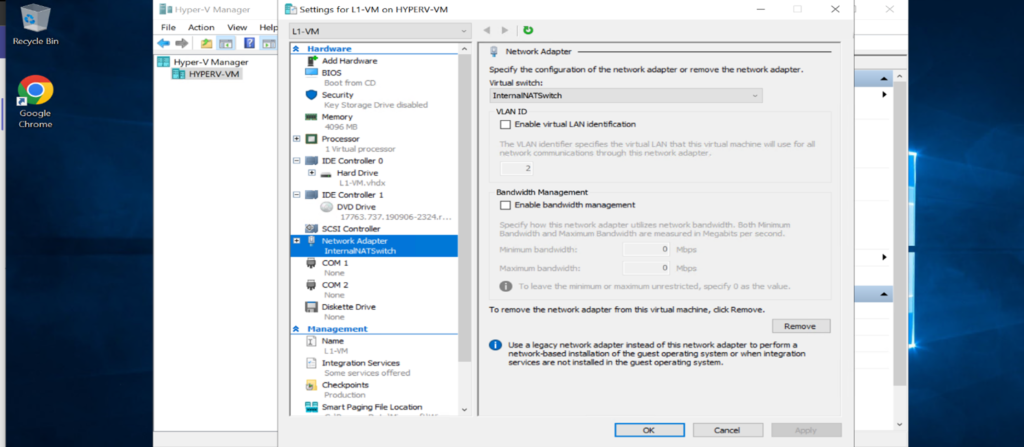
- Now, let us go to the settings of the VM we created and change the networking adapter to InternalNATSwitch.
Note: - Since we have already connected this switch during the creation of the VM so we can do this step to verify the switch.
Now, let us configure the network adapter IP address to be in the same subnet as the NAT network with the default gateway of the NAT (192.168.100.11)
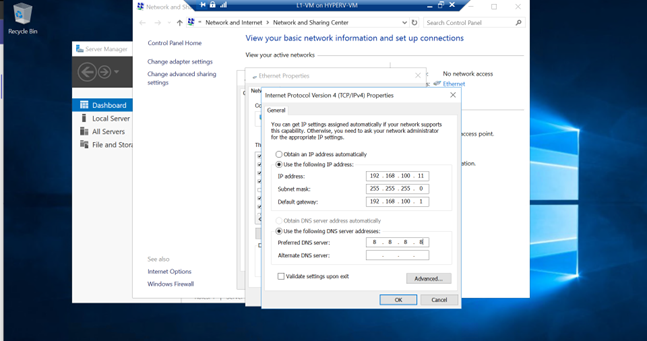
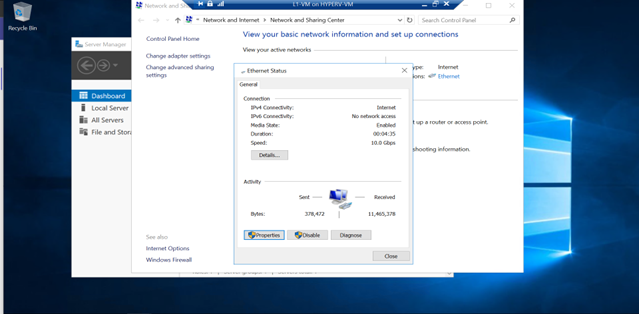
- Now, we can check the guest VM, and Internet will be enabled.
As we have downloaded Linux Ubuntu ISO as well, now we will configure the internet in Linux guest VM:
We will follow the same steps as above for creating a guest VM and will just add Ubuntu ISO in the iso section and the name of the guest VM as mentioned below: -
Now, let us configure the network adapter IP address to be in the same subnet as the NAT network with the default gateway of the NAT (192.168.100.12)
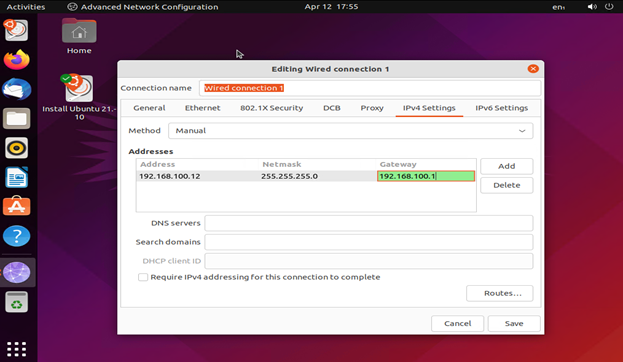
- Now, we can check the Linux guest VM, and Internet will be enabled.
Conclusion :
Nested virtualization is a great step forward for Microsoft’s Hyper-V platform running in Azure. Azure provides a powerful infrastructure platform that is available from anywhere running on top of Microsoft’s world-class data center infrastructure. Utilizing Azure to run nested VMs is a great way to easily provision resources for DEV/TEST or even production use cases such as Hyper-V containers. Provisioning nested virtual machines running in Azure is easily accomplished with only a few steps, most of which can be done using PowerShell. This provides a great tool for Hyper-V administrators to provision nested resources not only on-premises but also in the Azure public cloud environment. This allows scaling resources and prod/dev/test environments almost infinitely.
There are a number of reasons for you to use nested virtualization. With advanced flexibility, effective management of workloads, for testing and training purposes and all without the requirement of additional hardware. There can be some compatibility issues between host hypervisor and the guest hypervisor or the supporting OS, but with proper navigation, you can meet these challenges and make maximum use of a more sophisticated technology.
Ready to See CloudLabs in Action?
Turn your ideas into hands-on experiences. Tell us what you're looking for, and team CloudLabs will help you find the right solution.